|
One of the easiest stitches to start with when you begin embroidery is the running stitch! Here is a demo I created for you to help with your stitching! If you get stuck, you can always watch the video again to help you!
0 Comments
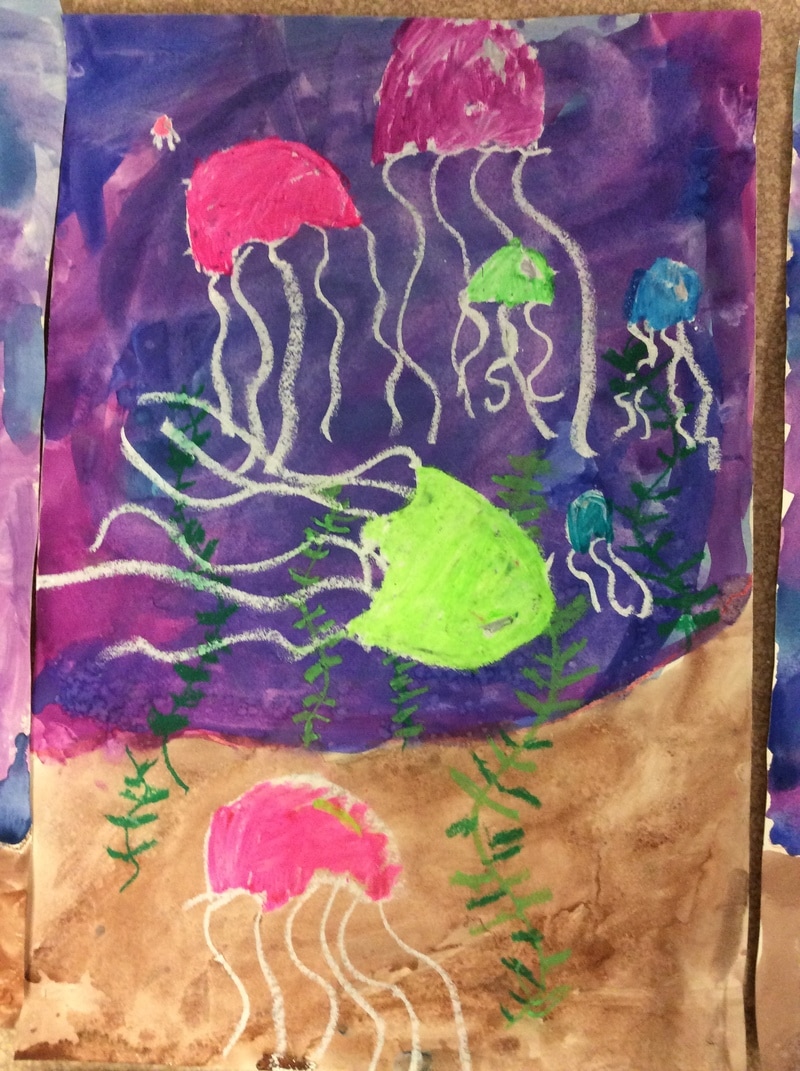
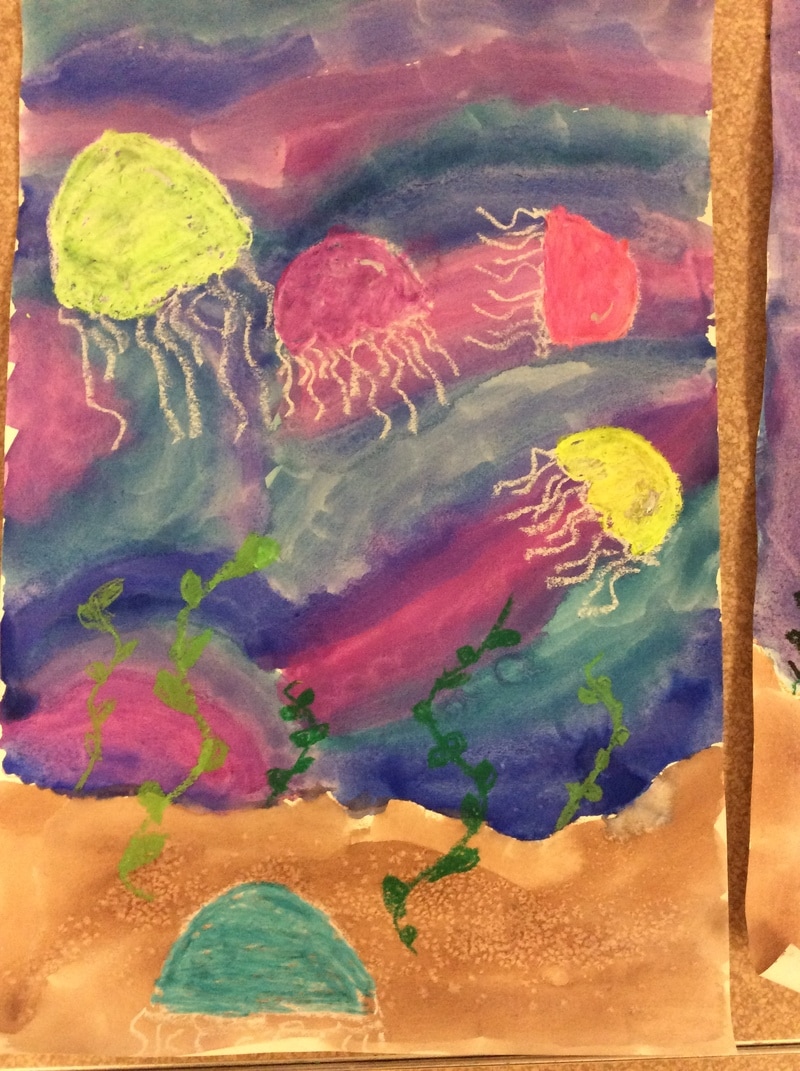
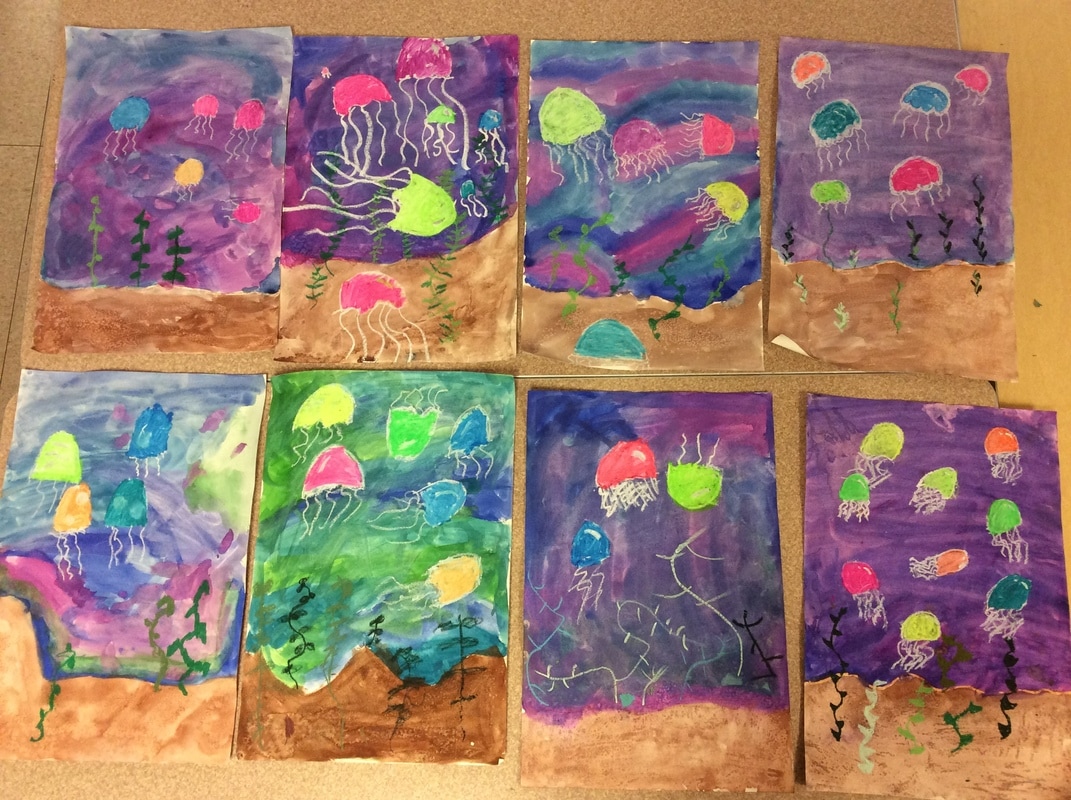 This was a mixed media project, 2nd grade artists got to use watercolor, tempra, crayon, oil pastel, chalk pastel, and even salt to create their finished work of art. Our main focus was learning how to show movement in a work of art. We watched videos of jellyfish swimming around and discussed what kinds of lines could give that same impression of movement. We also worked on blending while painting our backgrounds with analogous colors. 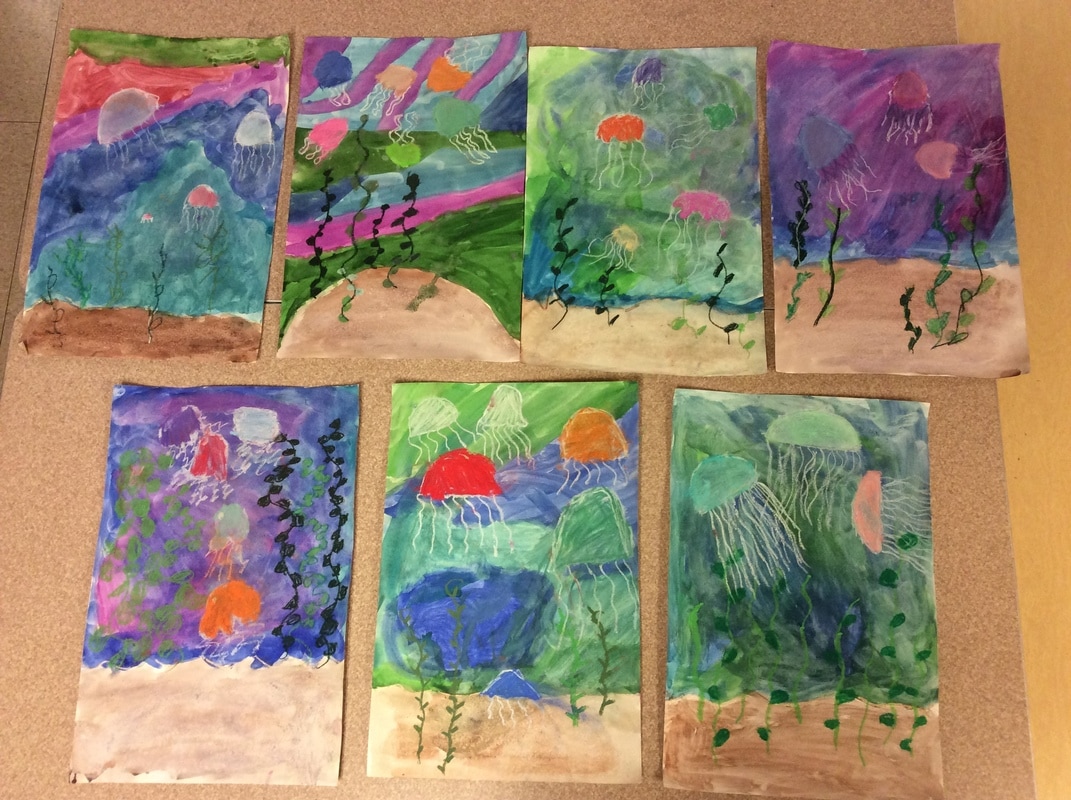
I created a demo video so that you can watch the demo and review any steps that are confusing while making your sculpture! This also gives you the opportunity to practice at home! Remember that you can decorate your paper sculpture with simple patterns if you would like, or you could make multiple sculptures and attach them to the same base for a very interesting look! Thanks to our amazing PTA here at Robinson Elementary we were able to get some new storage here in the art room. One of my main goals for creating a more organized space was to make it easier for students to find what they need and be more independent. Artists need to be able to decide which material will be best for each work of art they create. Just because an artist loves to paint does not always mean that every design will work best in paint. Students have the opportunity to practice in their sketchbooks in order to determine what will work best for them. 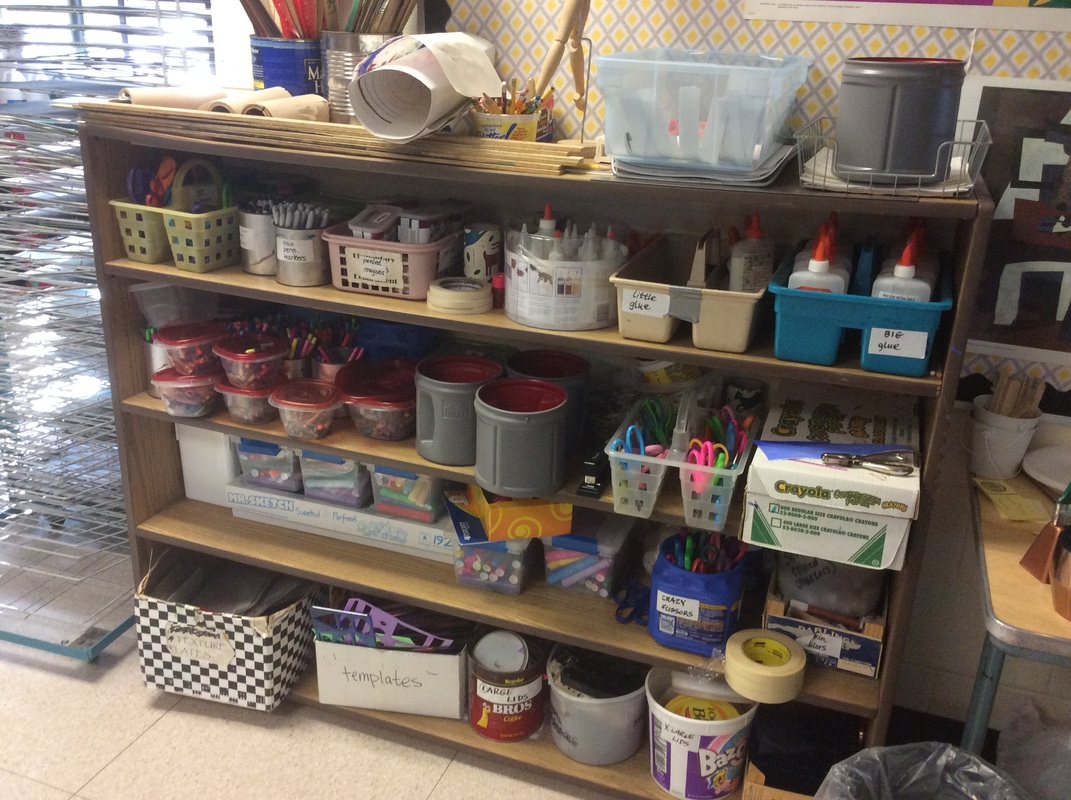 BEFORE When I first arrived at Robinson last year I was happy to see the variety of materials available to our students. At the same time I was overwhelmed by the "variety" of containers they were being stored in. I knew that if I was being visually overstimulated and unable to find what I was looking for, it would take students twice as long! It was also a challenge to fit everything onto our shelves with so many different shaped containers. That is when I came up with the idea of color-coding materials by table. Each table has access to the same materials, they are organized in the same order for each table separated by color. Students have done any amazing job keeping them organized and has sped up their clean-up process! Less time cleaning means more time art-making! 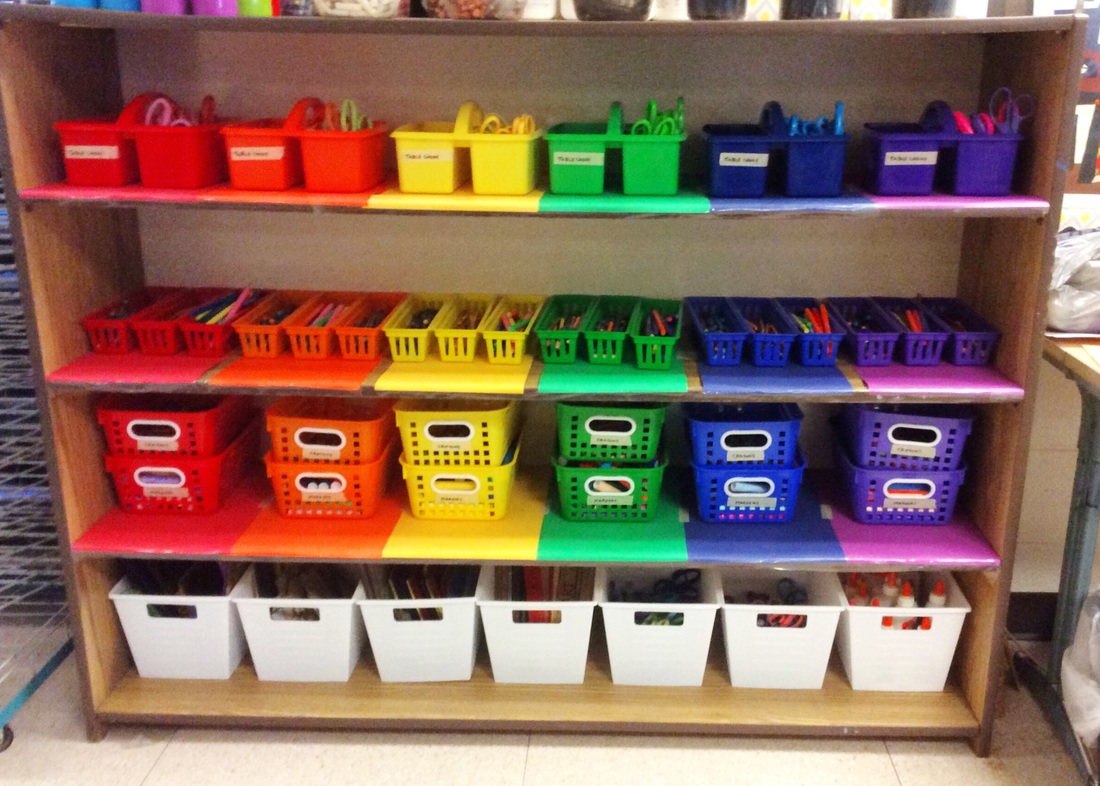 AFTER What do you think? I am loving the way it looks and the students do too!
The craziest part is that it is all the same materials, nothing was moved or thrown out. It is amazing what new containers can do for a space! THANK YOU TO OUR WONDERFUL PTA FOR SUPPORTING OUR ARTISTS! 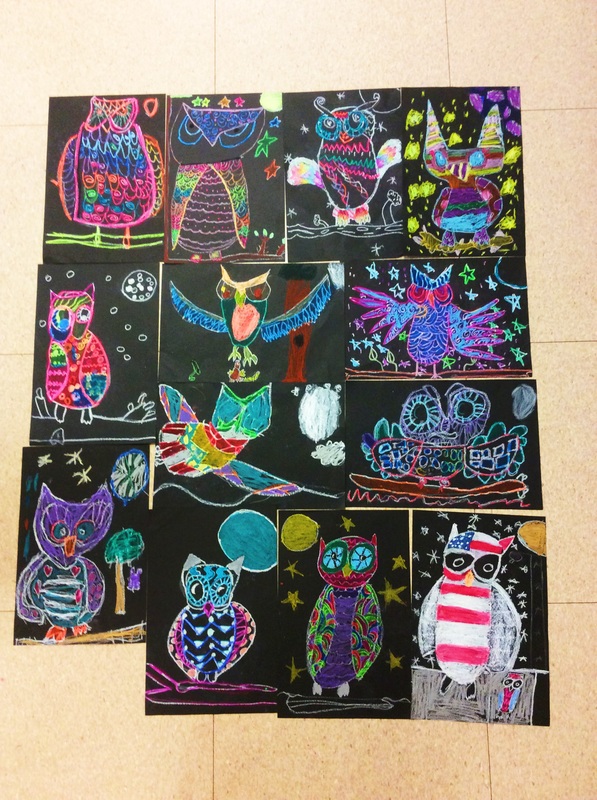 2nd grade recently wrapped up this amazing project and I love how they turned out! Look at how different each of these owls looks! I love seeing their individuality come through their art! Our learning targets for this project was first to use proportion to draw an owl and to create implied texture using patterns. Their work is amazing! I wish I had a camera big enough to photograph every single masterpiece! 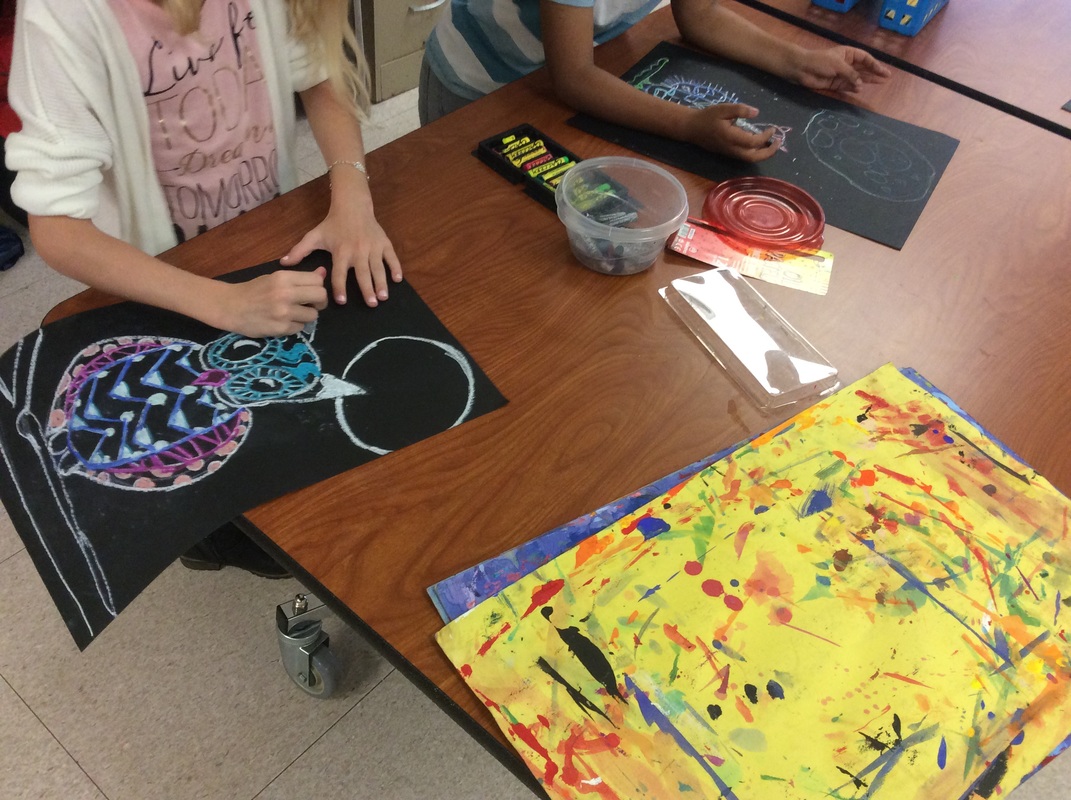 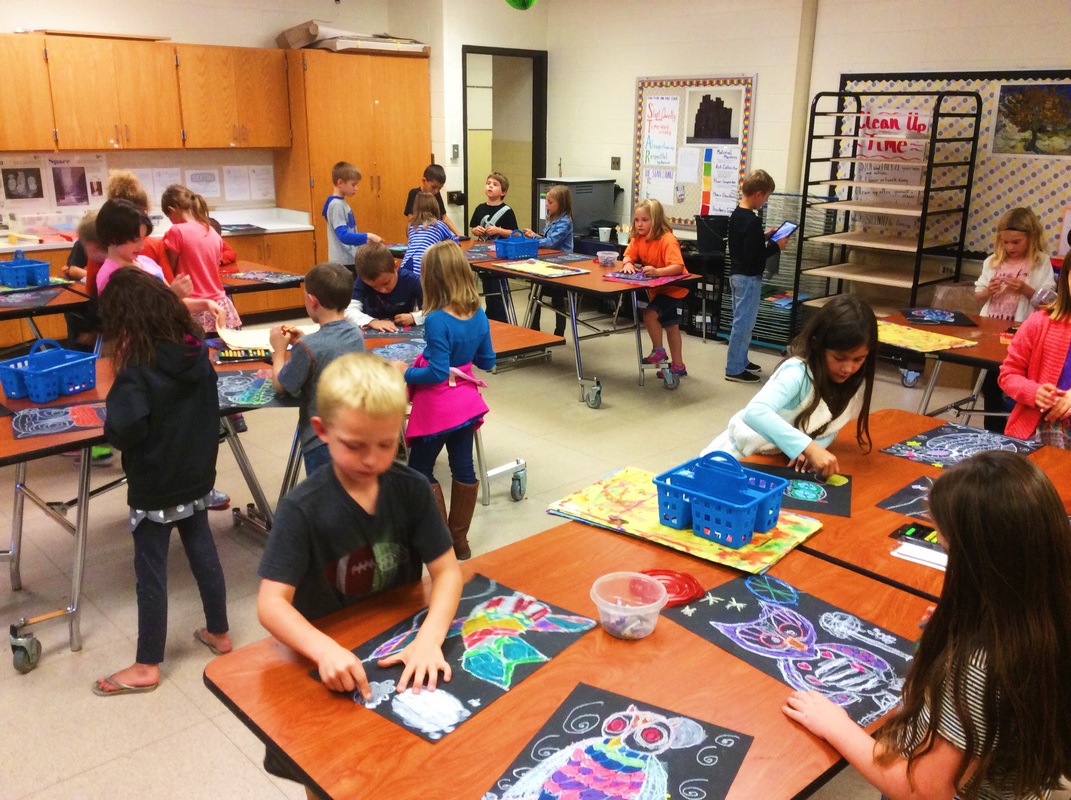 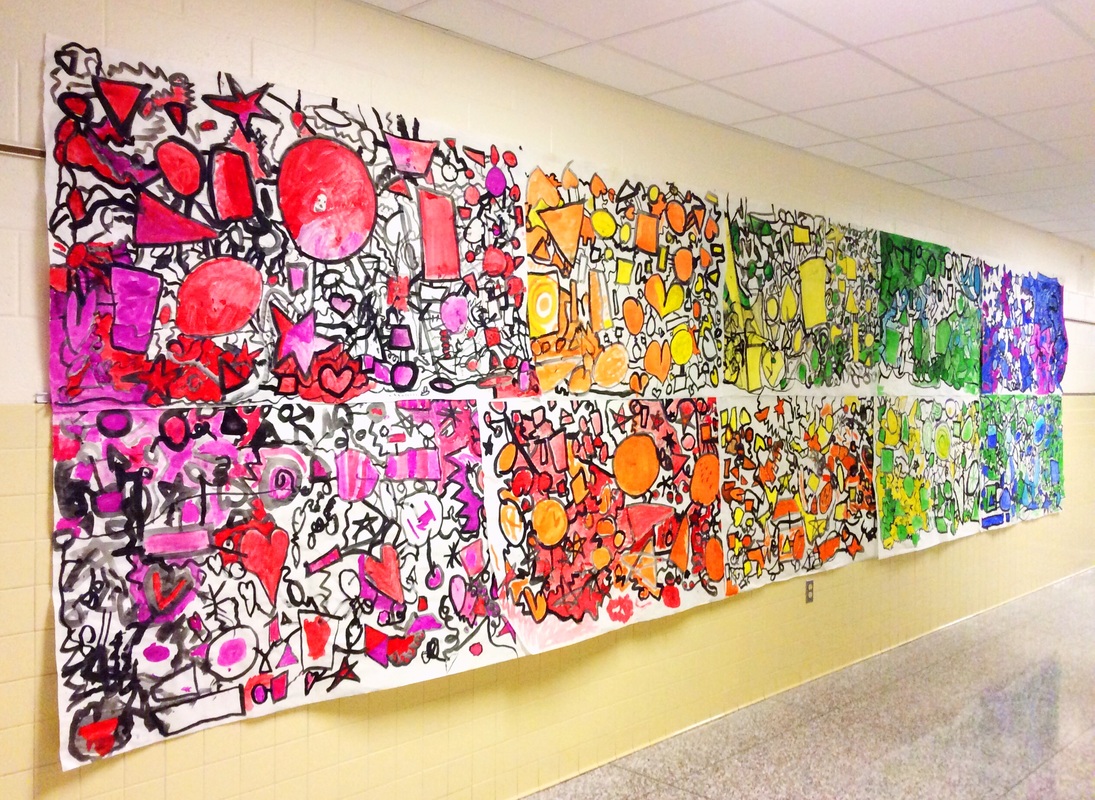 I love to start every year with a large collaboration project. This gives students the opportunity to jump into the art action painting on our very first day together! It also gives them the chance to be a part of something bigger than they could accomplish on their own. Our art room is not only a single class but a community filled with artists that come to this place to explore and create. I want each student to feel as though they are a part of this community and our collaboration displays offer that in a fun and exciting way. 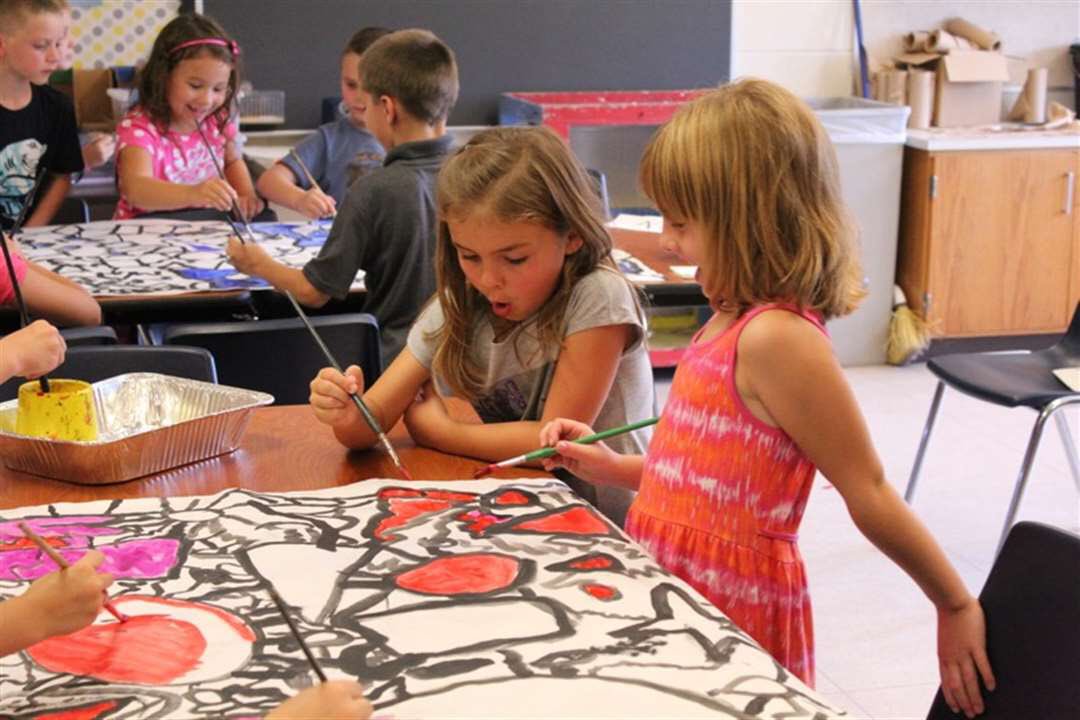 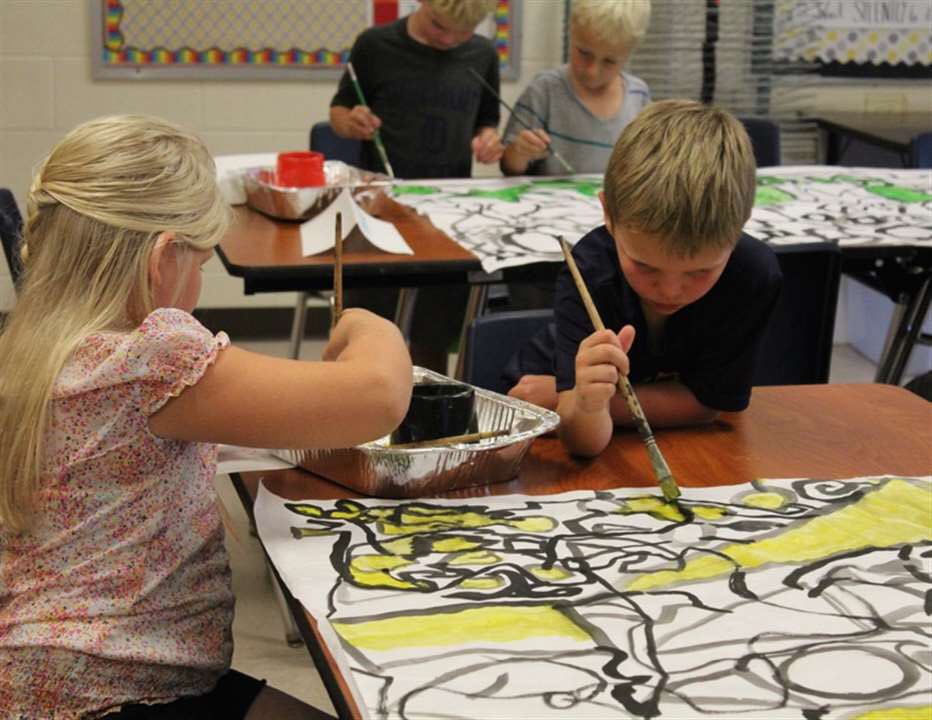 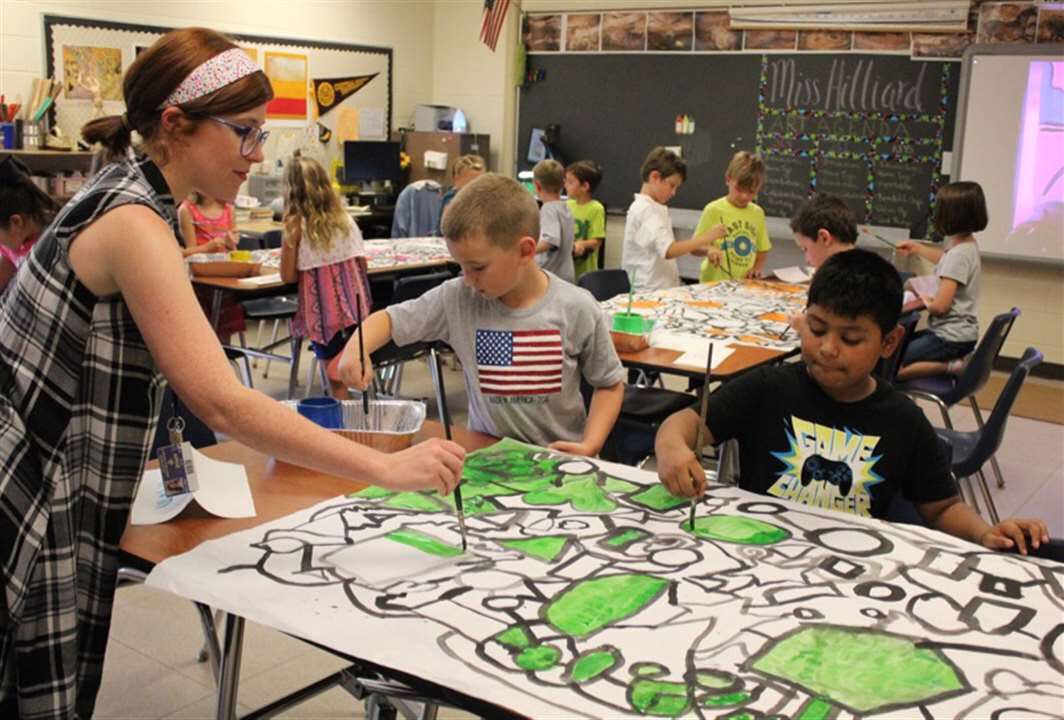 This was created by 2nd, 3rd, and 4th grade! Each class did a different step in the process and once it was completed we hung them all together to create a gorgeous non-objective rainbow outside our creative space!
I am so proud of all the work the students did starting the year off right! |
Miss HilliardHello there! I teach K-4 art at Peach Plains and Robinson Elementary Schools in Grand Haven, MI. Archives
December 2016
CategorY
All
|
 RSS Feed
